Monday, September 19, 2016

My Favorite Advances in Cancer Treatments

Cancer sucks. And, sadly, so do some of the treatment options. But things have improved over the decades, and I wanted to write about some of the options that helped when I was being treated. There's one that I consider to be a mind-blowing gift from heaven, so read on.

1. The "We've made considerable progress on nausea" Solutions

I always felt sorry for the doctors and nurses when they tried to sound enthusiastic about chemo. One of the treatments that I did was nicknamed "the red devil", and for good reason. But the days of yore when you came home from chemo and hurled all day afterward have indeed improved, thanks to an assortment of nausea medicines. They include one while dosing you, and then give prescriptions for additional ones. And they let the patient decide when to take them and which to take. For the record, if you don't have cancer, please don't assume that if you take away the nausea, the chemo is a light-hearted romp in the woods. It is still invasive, can have terrible side affects, and can make you feel hideously awful while it is going on.

2. G-CSF Medications (treatment from heaven)

The cancer treatment that was recommended for me was considered aggressive. Aggressive because the treatments were administered in a much shorter time period than normal. So I got the same amount of medicine, but had much less time to recover between treatments. You've perhaps seen ads on tv for a medicine called Neulasta. Neulasta is a medicine that they can give you the day after your chemo treatment. It helps boost your white blood cells, which helps boost your immune system. There's also a kit called Neulasta Onpro that the nurses can stick on your arm after your treatment. You wear it overnight, and then the next day, it makes a buzzing sound and administers the medicine. You throw away the pack, and you're set. There are so many advantages to the Onpro - imagine if you're driving 2-4 hours to get to your cancer treatment center; you'd have to stay overnight, or drive back again, to get the next day's medicine. And then there's the whole fear factor thing... the last thing I wanted to do was go back in the day after treatment to get hooked up with something else.

Of course, the list of potential negative side affects on Neulasta look pretty bad. I'm pleased to say that I didn't have any issues, and I also didn't get sick once while I was in treatment. I'm assuming the Neulasta had something to do with that.

3.  The Port

It used to be, a nurse could grab my arm, poke her fingers around for a bit and then say, "Is it always this hard to find a vein?", and I'd be sliding toward the floor in a faint. If you're going to be doing treatments for several months, doctors may recommend a port. A port is a plastic device that is surgically installed under your skin. It allows easy access for doing blood draws and chemo treatments. I used a port, and it made going in for treatments a simple process.

There are negatives to the port as well. For the first couple of months, I was acutely aware that I had a plastic device installed under my skin. It seemed kind of creepy. And for me, the number of people who felt they had to tell me their port horror stories was the hardest. I think the port made treatment much easier and less frightening for me, but it's definitely a decision that you should make understanding potential issues.

4. Wigs and Freezer Hats

I thought, heading in, that I was not a vain girl and that losing my hair would be just one of those things that one had to deal with. But losing my hair turned out to be a traumatic milestone. I thought I was being a big wuss, but there it was, facing me in the mirror every morning. So I bought a wig, which I hated because it made me feel like I was plopping a hairpiece on top of my bald head. I hauled out the wig for special occasions, though, because I didn't want to embarrass other people. Most of the time I wore a baseball cap, and because people nowadays are so nice about not staring, after a while I concluded that they didn't even notice. After a while I concluded I was pretty invisible. That all worked for me, but note that insurance companies don't much care about how you feel about losing your hair, so they don't cover wigs.

A new invention has come out that you can wear during cancer treatment that basically keeps your head very cold, which inhibits the medication from reaching your hair follicles. My treatment was in 2015, and I didn't notice anybody wearing this device, so I assume it is expensive and also not covered by insurance. Also, it looks pretty doofy, but I suppose if all the girls getting treatment were sporting one of these, then it wouldn't seem all that bad.

5. The Wonders of Chocolate Hagen-Daz Ice Cream

Yet another quirk of chemo is that it can make food taste awful. Metallic. I pitied my husband, who spent so much time at the grocery store trying to find food that I would eat. Sometimes he went 2 or 3 times in a day. And I remember my brother serving up a meal of hot dogs with baked beans. He looked over and watched me put two beans on my plate; I have never seen such a sad look before or since. For me, at least, I was very sensitive to artificial ingredients. My husband and I became avid label readers. For me, what worked best, was fresh fruit and vegetables, and chocolate Hagen-Daz ice cream, because Hagen-Dez didn't have any preservatives or funky ingredients. If you want to cook up something for someone who is doing chemo, you'll need to ask which things they can eat, because the list will likely be pretty short.

What Else Do We Need?

1.  Make the Treatments Less Awful

I've heard of people who had cancer treatment who said that if they had to do it again because the cancer came back or a new cancer occurred, they wouldn't do it. Cancer treatment can be that bad. So if you ask me, we need more ways to make the treatment itself less awful. My chemo was hideous. I still have side affects, and expect that some of them will never go away.

2.  Find a Cure

I hated the part where the doctor held up a chart to show me what my odds were. When I buy a lotto ticket, I rarely win. And if I do win, I plunk down my winnings and buy again, and guess what? I lose. I don't like to think about the odds because I don't consider myself to be particularly lucky. We need treatments that have a 100% success rate.

3.  Prevent it Entirely

If I had to choose, I would put my money on a 100% cancer prevention solution.

How Can You Help?

As much as we might like the government to be taking care of cancer research, if you can spare some change for the cause, it could make the difference. You can donate directly to cancer research organizations, or you can sponsor activities like runs and bike rides and such. This year I gave a charity bike ride a try. This is totally outside of my comfort zone. I haven't run in a race or done anything like this since high school. But I'd like to see a cure, so I'm in.


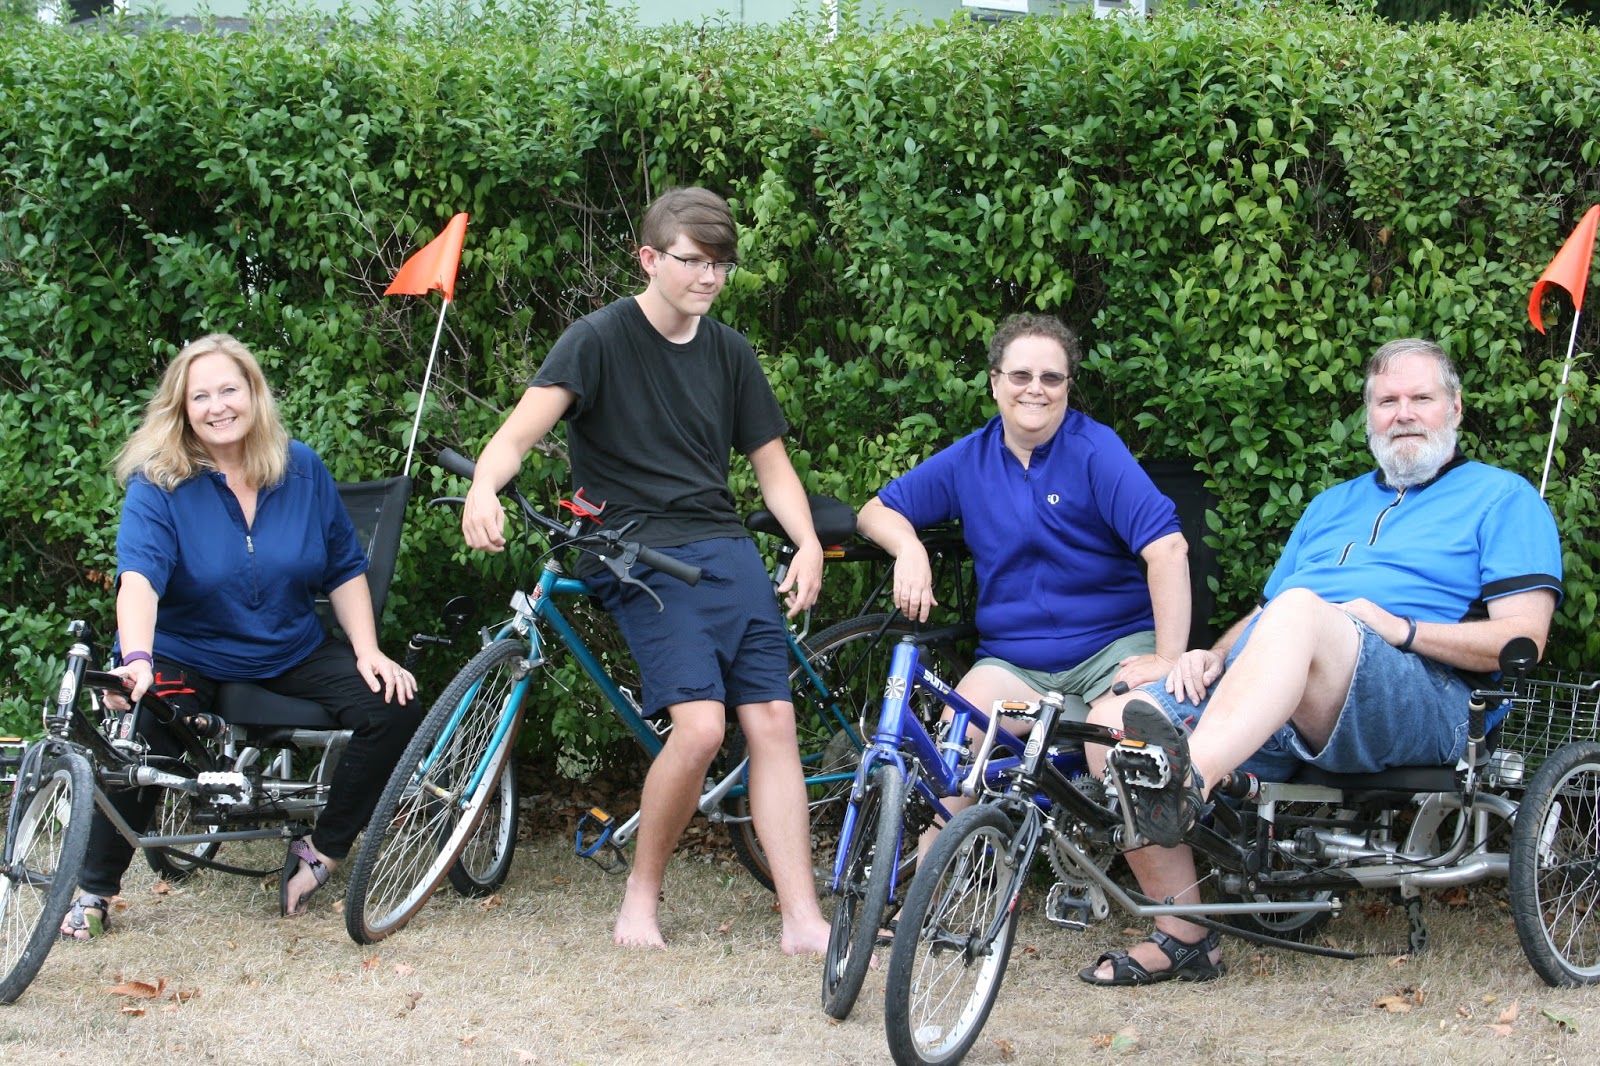
I was the slowest 10 mile biker in the lot. But we all finished, and we picked up two extra team members, my friend Denise's daughter Hannah, and Hannah's friend Shelby. And we raised $1,840 for cancer research. I am so thankful for all the people who sponsored us. I hate asking for money and doubt that I could stand to do that part of it again, but I loved all the training we did to prepare for the ride. So many people have helped me on my journey, I cannot thank them enough.


Friday, September 16, 2016

Don't Mock Me For My Jersey Obsession

I cannot lie.

I have a friend whose husband Tony rides in these charity bike rides. His last one, the 10th Annual Pan Ohio Hope Ride, took four days. Honestly, I can't imagine doing anything for four days, much less riding a bike. But he is definitely amazing.

Some day when I have rock hard butt muscles, I will ride a 4 day ride like Tony.
So then, I went on a trip with my brother and sister-in-law, and they went bike riding, and my brother had this dandy jersey on, and I thought, "I would like one of those... so pretty." Probably shouldn't think a jersey looks pretty on my brother, but what can I say?

So then I went searching to see what it would take to get a jersey. Well, of course, you can buy them. But then I got to thinking that I would like to earn my jersey. So I poked around until I found a charity ride, and if you get enough sponsor money, you get a pretty pretty pink jersey. I would be a princess in a pretty pretty pink jersey.

My charity ride was the 2016 Go Pink Breast Cancer Ride and Run on October 9, 2016. My husband Ed, my son, my friend Denise from high school, her daughter Hannah and Hannah's friend Shelby were on my team. We three adults rode the 10 mile ride, and Boy did the 25 mile bike ride; youth, it is wasted on the young.

So I started riding my recumbent bike so I could earn a jersey. To the grocery store. To the library. To the Post Office. Diligently, I rode. But golly, a jersey or two in the meantime, to tide me over, couldn't hurt. So now I've got some jerseys, all fraught with meaning. See what you think.

The Angry Bear Jersey - for days when I am grumpy. Grrrr...


The Ben & Jerry's Jersey - because every ride ends with a kiddie cone. My son finds this one to be the most hideous.


The Mrs. Shumway Jersey - when I was growing up, it was my chore to ride my bike to get the mail every day. Mrs. Shumway handled the front desk at the Post Office. Mostly I got this jersey because I liked the dark blue. But I'm also quite fond of the Post Office. They bring me stuff. And they take stuff away too. You can't get any better than that.


The Erie Lake Monster Jersey - for days when I am feeling very strong. Note to my Dear Sweet Husband: If this, per chance, is the jersey that I am wearing when one of those big rumbly trucks comes tearing up 15A and inadvertently takes me out, I hereby give you permission to rail at the heavens above with something like "My EYES! How could anyone not see that blast of ferociously overly bright freaking green? OH THE HUMANITY!"


The Hell on Wheels Jersey - it goes with my helmet. It's always good to accessorize.


The 2016 Go Pink Breast Cancer Ride and Run Jersey - My family and friends worked the hardest for this one.


Thursday, June 23, 2016

Inspiration at the Estes Park Wool Market

I made it to my first ever West Coast wool market, the Estes Park Wool Market, held in Estes, Colorado June 9-12. When I walked in the door, I knew I'd be happy. I plunked down my money and bought a fiber festival hoodie, and then I nearly walked right into the most beautiful quilted jacket. Check this out:


Look at the colors and the stitching. This was created by Amy Fox and is called My Secret Garden.

Then I saw these lovely knitting bowls made by wet felting. What a great idea... I could artfully arrange my yarn treasures all over the house in color coordinated bowlness. This is by Kay Dudek. I love the little button accent. Notice that she used both felt and silk, for nuno felting. The silk is the lighter green part of the bowl that is all ruchey (puckered). And do you see the button? What a lovely touch.


This was also offered by Kay. What a clever way to use up those glass nick knacks that you've inherited from Aunt Mabel:


One of my favorite booths was Bijou Basin Ranch. Why yes, I did want to buy some $100/ounce qiviut, but I couldn't think of anything that I could make that would do it justice:


My sister and I lusted over these woven yak scarves. They were oh-so-soft.


In the end, I settled for a t-shirt, as a remind of what might have been...


I have to admit, I wore my t-shirt to the airport, waited through a hideously long line, and can't believe that not one person chuckled. Have the people fleeing Colorado no sense of humor? Honestly, I thought this was the funniest t-shirt ev-er.

Monday, June 20, 2016

I Stand Prepared for the Harsh Winter Ahead

Check this out. I bought some hand-dyed Polwarth fiber from Honeoye Craft Lab. I love the colors, they are so bold. Isn't this lovely? I bought 8 ounces, so two of these:


This is what it looks like unraveled:


And this is what it looks like all spun up on my Hanson eSpinner:


Liz, from the store, taught me to Navajo ply. There are many nice things to say about Navajo plying:

1. You work with one ball of yarn, but triple ply, so you get a nice, thick yarn.
2. By using just the one ball of yarn, it is easier to preserve the stripes that you can see in the roving and yarn.
3. I found it less prone to knotting up while I was dealing with it, since there's just that one skein.

Here's what I knit with it, a lovely cowl and hat. That hat is super thick, perfect for a very cold walk in the neighborhood with my sweetie pie. There's a little bit of yarn leftover, though I don't think enough to make mitts.


Thursday, April 7, 2016

A Little Bling for that Thing

I love my mitts. Recently, I've started watching for small pieces of jewelry at estate sales and garage sales to add to the mitts to give just a little bit of glitz. See what you think:


You can't use too big a piece, or they get in the way or weigh the mitt down. And I've been thinking of tacking them down with a little thread. But they're super cute. And you don't have to get all matchy matchy and try for two pieces per set of mitts. One little bit of glitz will do. My first attempt was using a pin with a hat, but the pin was too heavy and the recipient parted with the pin. So if you try this, be careful to go for something lightweight.


Do you like my cardboard cutout hands? I had a bad day and chewed my fingernails, so I can't be a hand model right now.

Sunday, April 3, 2016

My "Only a Mother Can Love" Sock

This is my first sock. I have carefully extended my leg in such a fashion that it looks like a work of art.


I like my sock. It has a red yarn thread running through the heel, which you cannot see, because I am supposed to put an afterthought heel into this sock. But if I do that, then this sock would fit my husband, rather than me. Although I like him a lot, he hasn't done anything spectacular enough this week to earn this sock. So I suppose it will have to go heel-less. The yarn is very forgiving and does not seem to mind not having a heel.

I don't want to tell you about how bad the toe is. I tried to follow a pattern, but I am using teensy 9" circular needles, followed by 3 ever so sweet bendy double-pointed needles. None of the patterns take into account my avant-garde choice of needles. And then, at the end, I was supposed to have 12 stitches left on my needles, and I was supposed to do a kitchener stitch. I looked up how to do a kitchener stitch, and concluded that I had lived my life well and did not need to be the next person to learn how to do that. So I darned the stupid toe together in as delicate a fashion as I could come up with. Since you are not my floor, you will, hopefully, never get to see what happens when a woman has had a falling out with her socks.

This is the yarn that I used. I bought it at the Honeoye Craft Lab. It is hand dyed by Liz Yokel, the store owner.


There appears to be enough yarn to try this again. And perhaps, after I've had some Andy's Candies, I will come back to that. But for now, I am going to sit here with my one handknit sock that looks like someone stapled the bottom, and just be satisfied.

Liz's yarn is 400 yards, 4 ounces
75% superwash merino/15%nylon/10%tencel
hand dyed with eco-friendly dyes
4 ply, fingering/sock weight
7 sts/in, US 0-3 needle
$19 for the skein

Tuesday, March 22, 2016

Did I Ever Tell You the Story of the Three Legged Sheep?

True confession: I can only remember the punchline of two jokes. So here I'll share one joke, lifted from a joke website, with minor alterations to suit the story of last weekend's knitting exercise...

A traveling salesman trying to make a buck was driving through the plains of Nebraska when he decided to stop at a farmhouse coming up on his left. As he was walking up the driveway toward the front door of the house, a sheep with three legs caught his eye. It was just hobbling through the grass.
When the farmer answered the door and asked what he was selling, the salesman first asked about the three legged sheep.

"That sheep is the most amazing sheep in the land, son," the farmer said.

"Last year, our house caught fire when we were all asleep and that sheep ran in and woke us all up one by one and saved our lives!"

The salesman was surprised. "That is one special sheep," he said.

The farmer replied, "That's not all. Last summer, that sheep jumped into the pond and dragged my drowning son to safety. He would have died!"

The salesman was in disbelief as to how incredible this sheep was. "One question: why does he have three legs; is it from the fire?" he asked.

"No son, ya see, a sheep like that you just don't eat all at once."

*************************************************************************

So a couple of weeks ago, I was trolling around the internet and came across Honeoye Craft Labs on facebook. And I noticed they were selling kits to make sheep hats. Hats for people, with sheep knit on the hats, not hats for sheep. (I feel bad that I feel the need to clarify on that point, but I've heard about people knitting outfits for assorted endangered animals, so figured I must.)

And then I saw they were selling these bendy double pointed needles, called Neko curved dpns, and I watched a video about how to use them and thought maybe they could solve my problem with dpns. My problem with dpns is that I always look like I'm in a wrestling match at the end of my hat and mitts projects, with needles flying all over the place, and a certain amount of mumbling and ill-will.

So my husband took me for a field trip (I grew up in Honeoye, and it's only 20 minutes from where I live), and we picked up the yarn, a free pattern called BAA-BLE Hat by Donna Smith, and the bendy needles. And since I've never done multi-color yarn knitting, I hired Liz, who owns Honeoye Craft Labs, to teach me how to follow that pattern.  

Here's my first sheep hat. For a first time using multiple colors of yarn, I think I did pretty well. I'll admit, we got to a point pretty early on where it became clear that one of my sheep was missing a leg. Liz gave advice about how one might deal with that problem, but it seemed to me that a one legged sheep was sort of a badge of honor in the world of learning to knit. So I decided to let him soldier on as is. All the sheep ended up with faces in the right places, so I am pretty tickled.

My one legged sheep hat
I decided to make another sheep hat, with these adjustments:

1. The hat came out a little tight around the area with the sheep, so I'm going to try perfecting my stranded knitting skills. I also forgot to bring all my needles with me for my lesson, and the pattern said to switch from size 4s to size 4.5s, so I ended up knitting with size 4s for the whole thing. Also, I'm a tight knitter, so these sheep were pretty well destined to be dancing in a tight conga line.

2. I like a bigger brim, so I made my next one longer.

3. While I am not normally a hat pompom person, Liz made a pretty good case for buying a pompom maker.

4. I wanted to try a night sky at the top of the hat, so I bought a skein of dark blue yarn from Liz. The pattern called for four different colors of a yarn called Ella rae Classic Sport, a 100% wool yarn that cost $4.50/ball. It looks like I can get at least 2 hats out of the yarn that I originally bought, probably more with the dark blue, since you don't use much of the brown. I love the colors of the Ella rae - there's lots of variety, but the colors are just a bit muted, so they seemed more natural looking.

Here's the second hat, and a matching cowl:


As for the bendy Neko needles, I found that they work particularly nicely on thumbs for my mitts. I felt like I was able to finish more quickly, and that I had more control. I recommend them. They were $9.95 for a set of three - I took a look on ebay, and they were much more expensive there.

These are the mitts that I made with my bendy needles. I handspun this yarn, made with 50% white angora, 50% black alpaca, blended on my Patrick Green electric drum carder and spun up on drop spindles. Thanks to the bunny, these will be particularly snuggly.


Wednesday, March 16, 2016

Watercolour Painting with Wool by Renata Kraus

oooooooh! I've just received this fantastic book in the mail. It is by Renata Kraus, and she explains in lovely detail and with lovely pictures how she makes her wool "painted" artwork.


I can't wait to try out the techniques. Renata is a true welt felting artist. I highly recommend this book. I love the chapter at the end where Renata shows children's wet felting examples. 

Thursday, March 10, 2016

Man Candy, or the Candy Man?

For our anniversary a couple of weeks ago, I decided I would make my man a hat. So I made him a hat. Because of my deep love for him, I even did that careful knitter thing where I knit up a swatch to ensure that the yarn and needles were the right size.

I finished the hat in the wee hours of the morning with two days to spare. I put it on my head, because waking your husband up at 3am so he can try on a hat does not go over well over here, and I have to say, it was a dandy hat.

The next morning, he tried it on. And, sadly, it turned out that there is more to knitting a swatch than what I did. It seems my sweet husband's head is bigger than mine. Quite a bit so.

Little sigh.

So, I got out the yarn and knit a second hat. I added more stitches. And I knit an extra six inches for the brim. Another wee hours of the morning exercise. And he put this one on, and it was not bad. I suspect that if I had knit an extra 10 inches for the brim, it would be even better. But still, he's a handsome man and he looks quite marvelous.

So I made him a matching cowl.

Cleaning Lady looked at it and thought it would be too poofy, but my man can carry off just about any look.

So today we were going to go for a walk in the rain, and I suggested we get Boy to take our picture. There was a little contention over Dear Husband's choice of accessories. Boy argued that we are quite thoroughly an embarrassment. Dear Husband says everything coordinates. You'll have to judge.


The yarn for the hats and Dear Husband's cowl came from Sew Green, a charity in the 19th Ward in Rochester that teaches people to knit and sew, and sells donated supplies. This yarn is from Lang Yarns and is called Jawoll Magic. It is 6 ply superwash, 75% virgin wool, 25% nylon. It was dreamy to knit with. I got 3 great big skeins for $13.50 each. I have one skein left. I'm going to make a cowl for me out of it. I followed my favorite pattern for our cowls, from the sourcherries website. My cowl is from a different yarn, a gorgeous turquoise-y blue green-y Louisa Harding Kashmir Aran yarn, 55% merino wool, 35% microfiber, 10% cashmere. I picked up 10 50g balls at SewGreen for a mere $6 each.

The mitts are for Nanny Holly. I just finished them last weekend. I made the cuffs extra long so they could roll up and provide a little extra wrist warmth. Then I tacked the cuffs so they would stay in place. These are to go with a hat that I made Holly from Knit Picks City Tweed DK, in the color Morning Glory, This is a DK weight yarn that is 55% Merino Wool, 25% Superfine Alpaca, 20% Donegal Tweed. There were 10 balls of this, also purchased at Sew Green, for $25. I've made two hats out of it so far, and expect to use up more of the yarn by making cowls and matching mitts.

Here's Nanny Holly with her hat. The coordinating cowl is from handspun that I made a while back, filled with angora and silk and alpaca. I made it extra long so it could be wrapped three times around the neck. Nanny Holly is almost ready to head out in a snowstorm. Her baby is sporting a cowl as well, though I held onto that because I imagine a cowl would at worst be a choking hazard, if not the ultimate drool cloth.


All our hats are from a pattern called Bronze Age Hat Free Knitted Pattern. I love this hat pattern. It is very comfortable.


Wednesday, January 27, 2016

Curse You, Thumb Gusset!

I have been prodigiously prolific this week and last. My very narrow repertoire of one cowl pattern made on an assortment of different sized needles has held up well. Hats, following the pattern my mother taught me, are starting to look somewhat similar; a good thing given that they are all following the same pattern. But it is the thumb gusset for mitts that is my nemesis. Stupid thing. I've made one mitt, on teensy circular needles, and it is like knitting with toothpicks and a short line of dental floss. If I have arthritis, it is speaking to me now as I slog away on my mitt. And the sad thing about mitts is that you have to do two of them. Curse you, thumb gusset.

Here's my thumb gussetting nemesis. The yarn is a gorgeous turquoise-y blue green-y Louisa Harding Kashmir Aran yarn, 55% merino wool, 35% microfiber, 10% cashmere. I picked up 10 50g balls at SewGreen for a mere $6 each. It's very soft. So far, I've used 3 balls to make the cowl - the balls are 83 yards each and it's recommended to use a size 8 needle. I am working with a size 7 9" circular needle, which is likely too small, but I like how tight the knit is... I just don't enjoy doing the tight knitting. The mitt used quite a chunk of one ball; it would be enough to knit a full mitten if I weren't so mad at the gusset just now. 

I've got six balls left, so I've got one more mitt to make, a hat, which I think will take two balls... I suppose I could make another cowl and then come up with some other yarn in a complementary color for a hat and mitts. We'll see. That second mitt is going to kill me.

Here's my current mitt recipe, so I don't forget it. Note that I make no claim to being a pattern writer; there are lots of people who are better at this than I:

On size 3 9” circular needles:
  • Cast on 36 stitches, place a row marker
  • Knit one perl one for 25 rows
  • Knit 10 rows
  • Knit 2 stitches, place a second row marker, finish the row, then knit a row. Then increase a stitch, knit the two stitches between the row marker, then increase another stitch (so now there are 4 stitches between the row markers), finish knitting the row, then knit another row. Keep increasing until there are 14 or 16 stitches for the thumb gusset, place stitches on pin
  • Knit 10 rows, perl 2 rows, cast off
  • Use double pointed needles and split off the 16 stitches for the thumb gusset. Increase 3 stitches while circling around the thumb, battle mightily until you cannot stand it any more (5 rows), then cast off in disgust and get out the darning needle to fix all the bad mojo. I also had to break out my nail manicure kit to grind down my nails so they would stop catching on the yarn in my mitt.
Another version that I like:
  • Cast on 34 stitches (really, for me it just depends on the thickness of the yarn and how many stitches can comfortably fit, taking into consideration that with the circular needles things get tight when I add on the additional stitches for the thumb gusset). Place a row marker.
  • Knit one perl one for 15 rows.
  • Add a little fanciness - I'll knit a row and then perl a row to get a border above the cuff and then knit 13 rows for a total of 15 rows; or I'll knit a row and then perl a row, then knit two together and then yarn over for a row, then perl a row and then knit 12 rows for a total of 15 rows.
  • Knit 2 stitches, place a second row marker, finish the row, then knit a row. Then increase a stitch, knit the two stitches between the row marker, then increase another stitch (so now there are 4 stitches between the row markers), finish knitting the row, then knit another row. Keep increasing until there are 14 or 16 stitches for the thumb gusset, place stitches on pin
  •  Add another round of fanciness - I'll knit 8 rows and then perl 2 rows and cast off, or I'll knit 7 rows and then perl a row, then do a row that knits two together and then does a yarn over. Cast off.
The cowl pattern is a free pattern I found on pinterest by SourCherries. It is my current favorite cowl pattern, so I keep making the same one. 

UPDATE - I finished the other mitt, and for some reason it went much more smoothly than the first mitt, so all is well. The first mitt is a little tighter fitting, but I don't think that's a problem.

I made a matching hat, using a free pattern I found at Expression Fiber Arts called Bronze Age Hat Free Knitted Pattern. It was a delight to knit, producing a cozy, slouchy hat, and the pattern was easy to follow. I had to learn one new stitching skill, ktbl. I learned this by watching a youtube video. Bless the internet, it has made my life bearable. A special thanks to Chandi Agee for sharing her pattern. Don't look too closely, as I didn't get it done perfectly, but still, it turned out very well and I'm going to do another with a different yarn.


Now I'm down to four balls left... what to make?

I also finished this dandy cowl. I picked up 3 skeins of vintage Noro Silk Garden for $8 each at SewGreen. I never would have thought to put these colors together, but I really like them.


I bought this yarn because I had heard a lot about Noro and wanted to try some. Each ball was 50 grams, consisting of 45% silk, 45% mohair, and 10% lambs wool. It's pretty soft. It is self striping yarn, which means each ball has long, 15 yard stripes of color. 

I'm planning on dyeing yarn this summer and I want to try this technique myself. I figure, you measure out the yarn in 15 yard increments and sort of pile it up. And then you pick different dye colors and dye each of the piles. I think I'd also like to try taking different colors of roving and weighing them out and then spinning a certain amount of one color, then switching to another color and spinning that, and so on. Now that I've seen these colors, I can see a way to make use of some of the brown alpaca that I've got tucked away in the basement.

I also wrapped up some yarn for a friend of my sister's. The turquoise blue yarn is 1/3 silk, 2/3 alpaca and dreamy soft. The multi-colored yarn has lots of different stuff in it, mostly alpaca. You can see purples and greens and some turquoise:


Saturday, January 9, 2016

Old Grapes Make Pretty Good Row Counters

Those of you who are old hands at knitting probably have some sort of device to keep track of your rows. I have one somewhere, but I'm not sure where it is. So I decided to use grapes. I've got these grapes sitting next to me that didn't taste all that good, so now every time I finish a row, I put a grape onto a plate, and when I get eight grapes, I switch to purling and throw out the grapes. Don't mock me, it's working pretty well, and it makes me feel a lot better about the crappy grapes... kind of like I'm giving them new life.

I also read that you could use a piece of yarn as a stitch marker. I'm pretty sure I have two packages of stitch markers, but I can't remember where those are.. I can see one lonely marker sitting next to me, but that's it. So the scrap of yarn is working as my stitch marker for now... kind of makes me feel silly about buying those packages of stitch markers. Seems to me like if my kid gets braces, I could use those colored rubber bands...

Last week I decided I wanted to make some yarn for my friend Linda. I didn't want to oversell its virtues, so I added a dandy truth in advertising statement to each of the skeins:

Moderately (but not embarrassingly) Imperfect

Pretty Pretty Princess Mitts

I am quite the adventuress these days, and so last week I got all wild and learned how to make mitts. Mitts, not mittens.

The biggest virtue to mitts, if you ask me, is that you get to stop knitting them before they become mittens. This was my first attempt to make two of something, and I wore out pretty early on once I learned the sacred nuances of the thumb gusset from my friend Channyn.


Wondering about the virtues of mitts? They make your fingernails look bright and shiny. I'm told they could be useful if you are a farmer... milking the cows? Holding onto the reigns when you ride a horse? Ah, whilst riding through town on a cold day in a convertible, you could perch up on the headrest and wave your most queenly wave to passersby. Yes, that's how I would use these mitts.

Now I've wrapped up two lovely cowls out of this yarn, and two more hats, and a total of two sets of mitts. My husband has a friend who has an identical twin sister who is in nursing home rehab, so I think I'll send them a hat, cowl and mitts set for each, so they can be ultimate twinners. 

I also made a hat and scarf that I sent to my friend Cindy. The scarf has a ruffle that my friend Joyce taught me to make. And the hat is perfect for chemo in the wintertime, warm enough to wear out and about if it isn't toooo cold, and soft and comfortable enough for indoor wear when you need a little something to contain the heat.

Cindy's scarf and hat
Two hats, two sets of mitts, two cowls for Jeanie and her sister

That's the last of this yarn, called malabrigo rastita 863 Zarzamora. It is lovely yarn, but I am thoroughly tired of looking at it. Kind of pricey at $15.20 per skein, but it was lovely to knit with and I certainly got a lot of projects out of the six skeins that I purchased.

Just so I won't forget how to knit these projects:

The hat:

Size 7 circular needles, cast on 76 stitches, knit one perl one for the brim for a couple of inches, knit for 8 inches and then decrease until you have to switch to double pointed needles and keep decreasing until done. That's not a true pattern, for sure. Every hat made came out differently because one hat I cast on 78 stitches, which changed how the brim worked out, and I didn't even bother doing a brim for a couple of the hats, and there's a whole thing about how many stitches to decrease by and at what point, which I lost track of and the hats looked fine to me anyway.

The cowls:

The cowl pattern is a free pattern I found on pinterest by SourCherries. It is my current favorite cowl pattern, so I keep making the same one. 

Cast onto size 7 circular needles until you are sick of casting on (as far as I can tell, cowls can be thick or thin, long or short... if you make them really long you can wrap them around your neck more than once, and if you don't, then you can't). Knit the first row, then perl a row, yarnover and knit 2 together for a row, perl a row, then knit 8 rows, then start over with perling a row followed by the yarnover and then the knitted rows. Do this until you are sick of knitting or run out of yarn, finish with the perl/yarnover/perl thing plus one knitted row and then cast off.

The mitts:

I liked the size 3 teensy circular knitting needles that my friend Channyn gave me the best. They are clover 9" No. 3s. If you have arthritis, they give you a bit of a workout. As an alternative, you could knit with double pointed needles. I am still finding dpns to be floppy torture devices, but expect that at some point I'll get better at handling them. I knit one pair with size 7 teensy circular needles, but the 3s produced a nicer, tighter result. I'll try the 7s with a thicker yarn.

oh dear, my dog is snoring really loudly right now and I see she has her face stuffed into one of the cowls. I can't take it away, she looks way too happy.

With the 7s, I cast on 36 stitches, and with the 3s, I cast on 40 stitches. I knit one then perled one for the cuff, 20 rows. Next time I'd like to try making a longer cuff, say twice as long, and then fold it up. If the purpose of mitts is to keep your wrists warm, then doubling the cuff could really work for that.

After the cuff is done, I knit 10 rows, then I started working on my thumb. To do that, I put two stitch markers on either side of 2 stitches. Then I knit around and did a backwards knit (somebody will tell me the correct name of that stitch, I'm sure) to increase the stitch to the left of the rightmost marker, and then knit until the last stitch before the leftmost marker and increased with another backwards knit stitch. Then I finished knitting that row and knit one additional row, and when I came around and hit the stitch markers again, I increased 2 more stitches. I did this until I had 16 stitches between the stitch markers, but more importantly, I put on the mitt and squeezed the thumb gusset shut periodically to make sure my thumb would fit. I only forgot to knit the extra row for one mitt... there was much cursing and then I practiced my skill at undoing 10 rows of stitches, because it took me that long to notice that I had a very stout thumb gusset.

Next, I took one of those great big diaper pin things and moved the 16 stitches onto that. Then I increased one stitch. I can't remember why Channyn told me to do that, but it looked fine so that's what I do. Then I knit on through as if I didn't have a big diaper pin full of stitches hanging around.

Stop to thank your lucky stars for the invention of the darning or tapestry needle, because after everything is done, you go back and clean up your thumb gusset by sewing up any dangly holes that are hanging out. I did much less darning on the mitts that I used the size 3 needles on, because everything was held together more tightly with the small stitches.

Go on and knit 20 more rows to finish off the rest of the mitt. My yarn is curled at the top, so while I got decorative at the end of one set of mitts and did a perl/yarnover-knit 2 together/perl at the top, on the second pair, I just cast off and the top curled over nicely and looked just as good to me.

Now, go back to the 16 stitches hanging off the big diaper pin and split them across 3 doublepointed needles. After knitting around to where I started, I poked around and increased 3 stitches around the circumference of the thumb hole, trying to pick the spots to increase the stitches that wouldn't create big dangly holes in the knitting. But this is finicky work, so if you're a loose knitter, you might just end up with holes.I knit 5 rows and then cast off, and then dug out the darning needle to tie up loose ends and dangly thumb gusset holes.