Tuesday, August 31, 2021

What Can You Do With Old Lace?

My sister is cleansing her treasure collections and wanted to know what to do with old lace. Lace is hard! It looks so pretty, and you know some ancient relative made it, so it's hard to donate it or throw it away without feeling guilty. So, I still don't know what to do with doilies, as they are an unusual shape, but I had vintage crocheted lace border material, and I think I've found the perfect use for it.

So, I started with a Flax linen tank top. Flax is a company out of Syracuse, New York, I think. They're very popular around here. All the ladies who like linen like to wear Flax linen. You can find their lovely clothing at shopflax.com. Note that I shop for my Flax at garage sales. I bought this one for $3. 

So anyway, I had some crocheted border lace, and I carefully sewed it onto the front of my Flax shirt. I turned over the edges and sewed those in place on the edges of the inside of the shirt front. I suppose I could have sewn a piece to the back as well, but this is kind of thick lace, so it added weight to my blouse and I figured doing the front was sufficient. Also, it seems to me that if you go overboard with too much lace, you just look like you're wearing your Aunt Mariann's curtains.


Of course, I was very proud of myself and sent a picture to my sister, who responded with pictures of doilies. I suggested that they might make wondrous bikini tops, but neither of us are, unfortunately, in a position to model such garments. So if you are so inspired, keep those matching doilies in mind...


Monday, June 11, 2018

Composting? Oh, yeah, I have a system for that.

I come from a family of do-ers. We come up with an idea, do lots of research, come up with a complicated plan, purchase our supplies, and get to it. I have many failures, because I don't necessarily enjoy keeping up with my new projects. But I learn a lot and I try to evolve.

So, of course, I have a composting system.

First, there are my beloved worms. I love my worms, and I'm convinced they love me. I have a worm bin, which is a four tiered piece of architecture that I keep in the basement. With time, I've learned that just tossing food waste into the bin doesn't work well. The worms don't break it down fast enough, which causes little flies, and it's all very dissatisfying. So I collect my vegetable food waste and when I have enough, I blend it in my Bullet. Once I have my worm food slurry, I tote that downstairs and feed it to the worms. Note - this is rather time consuming and a bit icky. If you don't want to spend time with your worms, this may not be the hobby for you.

My worms, of whom I am inordinately fond
Eventually, the worms produce something that worm enthusiasts call "castings". Castings are worm poop. If you have an aversion to either worms or worm poop, this is not the hobby for you. Every couple or three weeks, I bring a 5 gallon bucket over to the worm bin, and I retrieve the castings from the bottom tier of the worm bin. Worms by this time have for the most part migrated up to the other three layers of their condo where there is more food. But not all the worms are smart enough to migrate, so yes, I sort through the worm castings and put castings in the bucket and I try to return as many of the dumb worms as possible to another layer of their bin. Theoretically, you could skip this step. Your worms should be, after all, prodigiously reproducing. But I am thrifty, so I do my best to salvage the worms. Worm bin worms, by the way, do not like their climate to be either too hot or too cold, so cultivating them outside is pretty hit and miss.

During the summer time, I fill up my 5 gallon bucket with worm castings and use it in my compost recipe. In the winter time, once it's full, I put a cover on my 5 gallon bucket and set it aside. I have lots of buckets, so I just keep slogging away filling buckets with castings. I find this rather therapeutic.

Once spring comes, I move on to my next level of composting. I have two wooden compost bins. I love them almost as much as my worm bin. They are near the house. They hold all the dirt that came out of the previous summer's big pots, whether from flowers or vegetables. They've spent the winter composting away. I am not strong enough to turn these piles, but since they are getting dirt from pots, they generally decompose pretty effectively over the winter.

My two wooden compost bins
I also have a tumbling composter. It holds compost from the previous summer, but it has a more important job with the arrival of spring. I use my tumbling composter to make the dirt for my summer's big flower pots. I have a recipe. I put a bucket of perlite or vermiculite in. And I put 2 buckets of peat moss in. I add one of my buckets of worm castings. And then I take my handy 5 gallon buckets and retrieve dirt from my two wooden compost bins, and fill the tumbling composter until it is full. And then I turn it 50 times. And then I fill the empty buckets with my perfect compost, and I drag out all my big pots and fill them with dirt and set them aside to bask in the sun. The dirt settles a bit over time, so I tend to add more dirt to the big planters while I wait for the next phase of my planting ritual.

My beloved tumbler
I have two three-tiered planting benches in my basement. They have grow lights and one heat mat each. At the end of the summer, I fill two of my 5 gallon buckets with a blend of peat moss and perlite and some compost, and I put those in the basement. I'll use those as the base for my seedlings in the spring. There are probably better recipes, but this recipe has worked well so far, so I think I'll stick with it. I also bring in all my non-hardy succulents and set them up on the planting benches for the winter.

My planting benches
Around March, I start growing seedlings on my planting benches. I use the heat mats to get the seedlings started, and then once they're growing, I move them to one of the other tiers, as I only have two heat mats, so I try to spread the love.

So, the seedlings grow, winter ends, and now I haul my buckets of castings outside and start making my compost that will go into the tumbler. Tumbling occurs, I fill the big planters, I set them out and wait for spring to start. Once it's warm enough, I bring the seedlings and my succulents out to the deck and let them harden off and grow some more. And then I plant the seedlings in the big planters and move them to a spot near a faucet and my husband sets up our irrigation system, and there we go.

Succulents

Tomato seedlings
As for what I grow... well, last year I did not have my perfect system in place, so I planted lots of tomatoes in the big plant pots and set them up on our deck. This seemed pretty good to me, but my husband had to wend his way around all the vegetation just to sit out in the sun. I don't think he really enjoyed this, but he's a good sport. This year, we added in the irrigation system in my front flower bed, so most of the big pots are there, all growing heirloom tomatoes, because last year I discovered that heirloom tomatoes taste wonderful, and non-heirloom tomatoes have no flavor. So I grew heirloom tomatoes from seeds of maybe 5 different kinds in the basement.

This is my first time growing tomatoes in the front flower bed. I am not sure whether this will work well, or if the neighbors will complain. So we'll have to see.
Also, I thought that the worms should be rewarded for their efforts to create castings, so I saved the seeds from one pie pumpkin last year. They grew quite happily in the basement and I'm just wrapping up planting them now. There is some chance that I've planted them too close to each other in not enough space, but I figured if that happens then I'll just thin them out and use what I thin as part of my compost mixture. Hopefully, we'll make a few pies out of the pumpkins, and the rest will be ground up in the Bullet and stored in the freezer for the worms to eat over the winter.

I actually grew quite an assortment of vegetables last year, but most didn't do particularly well on my deck, so for this year, I'm trying to stay focused with tomatoes and pumpkins. Once I master these, I'll try some other things.

But wait, there's more! I am trying diligently to be nice to the environment. So I also have a heavy duty paper shredder. I shred paper and boxes in that, and I feed that to the worms, or I put it in my "way back" compost piles. Those are at the back of my property. I try to layer shredded paper, dirt, leaves, and grass clipping there. This is my backup, should I run out of the beautiful compost that I make in my wooden bins. I'm afraid I lack the strength and enthusiasm to turn these compost piles, so they don't get as much loving attention as the piles that are closer to the house.

I also have friends who save their coffee grounds for the worms. I imagine my worms are quite delighted by this. Also, it gives me a reason to visit my friends, and for them to visit me.


Why I Cannot Be A Mushroom Farmer When I Grow Up

Spoiler Alert: It's All My Doctor's Fault

So, last year, I got to thinking that I really really like mushrooms. They taste good with butter. They taste good in recipes. So I started researching growing them myself, thinking that I could eat more mushrooms for less money. This did not turn out to be true, particularly after factoring in the doctor's bill and some concerns he had about mushroom growing, but certainly it seemed like a good idea at the time.

I started by going to a one hour class on growing mushrooms. I bought a jar with reishi mushroom spores that had been soaked onto little wooden dowels. Again, it seemed like such a good idea. We went home and floundered around looking for logs. Mushrooms are pickier than you might think. You can't just snag a log off the logpile. You need something relatively recently cut, and from a healthy tree. My cousin Susie offered up some logs, so we got out the drill and drilled holes and plugged the dowels into the holes and painted the holes with melted wax. Ongoing maintenance became the next issue. We had to figure out how to keep the logs cool and damp.

To keep the logs happy, I had an unused garbage can, so every two weeks, I filled it with water and let the logs soak overnight. Then I put them back under my porch. This didn't seem like a bad idea for the first few weeks, but eventually it became a bit of a chore. Now I'm looking at those logs and thinking that for this season, I would rather do just about anything other than fill that garbage can with water, drag out the logs, soak them, put them back under the porch, and then, being a waste-not want-not kind of gal, using up the water in the garbage can to water my plants.

By the way... reishi mushrooms don't actually taste good. They are used to make a medicinal tea that supposedly wards off cancer and diabetes and all sorts of other things. But you won't be frying them in butter. As it turns out, I do make reishi tea, not from my personal stock of mushrooms, though, because it's year one and they haven't actually grown. I bought my mushrooms over the internet. I make the tea (after researching "How to make reishi tea that doesn't taste awful") with pomengranite juice and assorted other ingredients in my Instant Pot. And then I make ice cubes, and I pop an ice cube into my water at night. For the record, reishi tea with pomengranite juice and assorted other ingredients pretty much tastes like tree bark. You have to have an adventurous spirit to enjoy it.

With more research, I decided I would try growing mushrooms indoors. You can buy a bag of mushroom spores in sawdust. You slice some lines in the bag, spritz it with water several times a day, and after a bit, you get mushrooms leaping out of the bag. This too seemed like a good idea at the time. But spritzing multiple times per day began to wear on my soul. We got our first flush of mushrooms from one of the bags and ate them all in two days. The second bag did nothing. Eventually I looked more carefully at the second bag and realized that I had purchased a big bag of mushroom spores. Worse, they were not attached to wooden dowels, so actually using them would require additional effort, and perhaps a piece of pricey equipment that would allow me to insert them into drilled holes in logs. Fortunately, I had completely destroyed this batch of mushrooms by cutting slits in the bag and repeatedly watering them, so I did not end up having to purchase the pricey piece of equipment. This batch became compost. Oh, and the first batch? The literature said you could get multiple flushes from the bag, but we had to go on vacation, so a solid week of not spritzing finished off the first bag. More compost.

I was pretty well set to stop trying to grow mushrooms, but my cousin Michelle mentioned wine cap mushrooms. They are supposedly the easiest to grow. I researched that, and concluded that if I had sawdust and woodchips, I could grow them in my two back flower beds. They have peonies in them and the area is very shadey. Just as I was pondering where to get sawdust and woodchips, our neighbors across the street decided to cut down a tree. "Could we have the sawdust?" They said sure. So they had this enormous tree cut down and we put the wagon on our lawn mower and headed over and collected up all the sawdust and took it over to our yard. That probably sounds like a light-hearted effort, doesn't it? Nope. We were sweating. But it wasn't the worst form of exercise we'd ever come up with. So we did that, realized woodchips were next, and asked if we could have those too. The guy who was chipping up the tree said we could have the woodchips, but we'd need to get in and get them the same day, because he had somebody who would come after he finished who would clean up the yard afterward.

Once more, we got the lawn mower and wagon out, along with our trusty shovels. And we started feverishly working to move those woodchips to our backyard. Things were going pretty well until our neighbor suggested that he had a lawn mower with a wagon too, so maybe my husband could fill his, take it to our yard, and while he was doing that, I could fill the neighbor's wagon. We'd get things done twice as fast! OHMYGOSH, WHAT WAS I THINKING? I'm an old out of shape woman, and filling up those wagons twice as fast nearly killed me. But by golly, we got it all done, everything was bagged up and ready to roll.

Now, this next part is my husband's fault. He should own it. He looked at the flower beds and said, "Well, I'm worried that we're going to put all that sawdust and woodchips down, and it'll blow all over the yard." So that night, I looked on craigslist for a solution, and sure enough, I found it. A fellow a couple towns away had been given an ultimatum. Get rid of the paving stones that had been sitting next to the driveway for 2 years, or find a new wife. So he put up an ad that said "600 paving stones for $50, must be moved by tomorrow." OK, so, first off, I didn't think 600 paving stones would be all that much to move. And I assumed we could move them all in one shot on our trailer that attaches to our van. And the weather conditions were not conducive. Nonetheless, we scored the deal and started texting the guy because he said we couldn't come to get the paving stones until 6pm, and the weather channel was predicting a big wet storm starting at 6pm. "Could we come earlier?" He finally agreed we could come at 4pm, so we did. It was pouring rain, and we started piling paving stones into the trailer. And that's when my husband explained that this was going to take three or four trips, which meant we'd have to fill the trailer, take it home, empty the trailer, and go back.

We begged some more and the paving stones guy's wife said we could take two days instead of just one. So we moved and unloaded two loads in the rain, and the next day we moved the rest. Now, through all this, I was moving a bit faster than my husband. He's 8 years older than me, and this was my dumbass idea, so I figured the least I should do is try to do the bulk of the work. So I was pretty tired after that second day, and having some trouble moving around. But we had the last load in the trailer, in the backyard, just waiting for someone to empty the trailer, and I thought, for my big romantic gesture, that I would empty the trailer myself, on the morning of the third day. So I picked up a couple of bricks and put them in the pile. And then my husband came out on the deck and said, "What are you doing?" and I picked up two more bricks, and that's when my back went out. So, apparently, not moving bricks, thank you very much.

So the day wore on, and I was in lots of pain and we dug out the heating pad and the Tylenol, and nothing much was helping. So we got onto the internet and read up on what to do for back pain, and I swear, WebMD said that walking would be the best thing for it, to loosen things up. So every day I got up and we went for a walk. A hideous, painful, "Ohmygosh, why did I buy those paving stones?" walk. Eventually I had to concede defeat, so we went to see my doctor.

"What did you do?" We told him the story. "And then what did you do?" We told him what WebMD said, and he rolled his eyes. I'm pretty sure he put his head in his hands. "Did it help?" "Um. No." "What else did you do?" "Well, we went to a wedding, but I swear we didn't do any dancing at the reception." "And why were you moving paving stones?" We explained about the mushrooms. And that's when we got a hearty lecture about people who don't know anything about mushrooms growing mushrooms. Pretty much, the message was, if the spores you bought like your setup, what's to keep other types of mushrooms from growing? And, you could die. So, he prescribed muscle relaxants and the heating pad and not walking until I didn't think I was going to die from walking.

In spite of the sage advice, we had gone to a lot of effort to gather our supplies, so we decided to plant the mushrooms. With my back recovered, I carefully laid down the sawdust, then put down the mushroom spores, then added the woodchips, and then circled the flower beds with paving stones. It really looked quite nice.

The mushrooms have started coming up. And we're looking at them, and I'm like, "Err... some of them are maroon on top, and some are not." And my husband says, "Well, we should at least take pictures and see if anyone can tell us which are which." And I said, "Well, first, I don't want to take a chance on dying from mushroom poisoning. It would be an embarrassing thing to have to put in my obituary. And second, I wouldn't want to be you if I did die of mushroom poisoning, because you'd have to explain it to the doctor. Let's just leave 'em here and let the deer and the bugs eat them."

And so it is, I will not be a mushroom farmer after all.

There's a pretty good chance that this is a winecap mushroom. It is maroon-colored.

These, on the other hand, are not maroon-colored. They look brown.

Sigh.


The end.

Monday, September 19, 2016

My Favorite Advances in Cancer Treatments

Cancer sucks. And, sadly, so do some of the treatment options. But things have improved over the decades, and I wanted to write about some of the options that helped when I was being treated. There's one that I consider to be a mind-blowing gift from heaven, so read on.

1. The "We've made considerable progress on nausea" Solutions

I always felt sorry for the doctors and nurses when they tried to sound enthusiastic about chemo. One of the treatments that I did was nicknamed "the red devil", and for good reason. But the days of yore when you came home from chemo and hurled all day afterward have indeed improved, thanks to an assortment of nausea medicines. They include one while dosing you, and then give prescriptions for additional ones. And they let the patient decide when to take them and which to take. For the record, if you don't have cancer, please don't assume that if you take away the nausea, the chemo is a light-hearted romp in the woods. It is still invasive, can have terrible side affects, and can make you feel hideously awful while it is going on.

2. G-CSF Medications (treatment from heaven)

The cancer treatment that was recommended for me was considered aggressive. Aggressive because the treatments were administered in a much shorter time period than normal. So I got the same amount of medicine, but had much less time to recover between treatments. You've perhaps seen ads on tv for a medicine called Neulasta. Neulasta is a medicine that they can give you the day after your chemo treatment. It helps boost your white blood cells, which helps boost your immune system. There's also a kit called Neulasta Onpro that the nurses can stick on your arm after your treatment. You wear it overnight, and then the next day, it makes a buzzing sound and administers the medicine. You throw away the pack, and you're set. There are so many advantages to the Onpro - imagine if you're driving 2-4 hours to get to your cancer treatment center; you'd have to stay overnight, or drive back again, to get the next day's medicine. And then there's the whole fear factor thing... the last thing I wanted to do was go back in the day after treatment to get hooked up with something else.

Of course, the list of potential negative side affects on Neulasta look pretty bad. I'm pleased to say that I didn't have any issues, and I also didn't get sick once while I was in treatment. I'm assuming the Neulasta had something to do with that.

3.  The Port

It used to be, a nurse could grab my arm, poke her fingers around for a bit and then say, "Is it always this hard to find a vein?", and I'd be sliding toward the floor in a faint. If you're going to be doing treatments for several months, doctors may recommend a port. A port is a plastic device that is surgically installed under your skin. It allows easy access for doing blood draws and chemo treatments. I used a port, and it made going in for treatments a simple process.

There are negatives to the port as well. For the first couple of months, I was acutely aware that I had a plastic device installed under my skin. It seemed kind of creepy. And for me, the number of people who felt they had to tell me their port horror stories was the hardest. I think the port made treatment much easier and less frightening for me, but it's definitely a decision that you should make understanding potential issues.

4. Wigs and Freezer Hats

I thought, heading in, that I was not a vain girl and that losing my hair would be just one of those things that one had to deal with. But losing my hair turned out to be a traumatic milestone. I thought I was being a big wuss, but there it was, facing me in the mirror every morning. So I bought a wig, which I hated because it made me feel like I was plopping a hairpiece on top of my bald head. I hauled out the wig for special occasions, though, because I didn't want to embarrass other people. Most of the time I wore a baseball cap, and because people nowadays are so nice about not staring, after a while I concluded that they didn't even notice. After a while I concluded I was pretty invisible. That all worked for me, but note that insurance companies don't much care about how you feel about losing your hair, so they don't cover wigs.

A new invention has come out that you can wear during cancer treatment that basically keeps your head very cold, which inhibits the medication from reaching your hair follicles. My treatment was in 2015, and I didn't notice anybody wearing this device, so I assume it is expensive and also not covered by insurance. Also, it looks pretty doofy, but I suppose if all the girls getting treatment were sporting one of these, then it wouldn't seem all that bad.

5. The Wonders of Chocolate Hagen-Daz Ice Cream

Yet another quirk of chemo is that it can make food taste awful. Metallic. I pitied my husband, who spent so much time at the grocery store trying to find food that I would eat. Sometimes he went 2 or 3 times in a day. And I remember my brother serving up a meal of hot dogs with baked beans. He looked over and watched me put two beans on my plate; I have never seen such a sad look before or since. For me, at least, I was very sensitive to artificial ingredients. My husband and I became avid label readers. For me, what worked best, was fresh fruit and vegetables, and chocolate Hagen-Daz ice cream, because Hagen-Dez didn't have any preservatives or funky ingredients. If you want to cook up something for someone who is doing chemo, you'll need to ask which things they can eat, because the list will likely be pretty short.

What Else Do We Need?

1.  Make the Treatments Less Awful

I've heard of people who had cancer treatment who said that if they had to do it again because the cancer came back or a new cancer occurred, they wouldn't do it. Cancer treatment can be that bad. So if you ask me, we need more ways to make the treatment itself less awful. My chemo was hideous. I still have side affects, and expect that some of them will never go away.

2.  Find a Cure

I hated the part where the doctor held up a chart to show me what my odds were. When I buy a lotto ticket, I rarely win. And if I do win, I plunk down my winnings and buy again, and guess what? I lose. I don't like to think about the odds because I don't consider myself to be particularly lucky. We need treatments that have a 100% success rate.

3.  Prevent it Entirely

If I had to choose, I would put my money on a 100% cancer prevention solution.

How Can You Help?

As much as we might like the government to be taking care of cancer research, if you can spare some change for the cause, it could make the difference. You can donate directly to cancer research organizations, or you can sponsor activities like runs and bike rides and such. This year I gave a charity bike ride a try. This is totally outside of my comfort zone. I haven't run in a race or done anything like this since high school. But I'd like to see a cure, so I'm in.


I was the slowest 10 mile biker in the lot. But we all finished, and we picked up two extra team members, my friend Denise's daughter Hannah, and Hannah's friend Shelby. And we raised $1,840 for cancer research. I am so thankful for all the people who sponsored us. I hate asking for money and doubt that I could stand to do that part of it again, but I loved all the training we did to prepare for the ride. So many people have helped me on my journey, I cannot thank them enough.


Friday, September 16, 2016

Don't Mock Me For My Jersey Obsession

I cannot lie.

I have a friend whose husband Tony rides in these charity bike rides. His last one, the 10th Annual Pan Ohio Hope Ride, took four days. Honestly, I can't imagine doing anything for four days, much less riding a bike. But he is definitely amazing.

Some day when I have rock hard butt muscles, I will ride a 4 day ride like Tony.
So then, I went on a trip with my brother and sister-in-law, and they went bike riding, and my brother had this dandy jersey on, and I thought, "I would like one of those... so pretty." Probably shouldn't think a jersey looks pretty on my brother, but what can I say?

So then I went searching to see what it would take to get a jersey. Well, of course, you can buy them. But then I got to thinking that I would like to earn my jersey. So I poked around until I found a charity ride, and if you get enough sponsor money, you get a pretty pretty pink jersey. I would be a princess in a pretty pretty pink jersey.

My charity ride was the 2016 Go Pink Breast Cancer Ride and Run on October 9, 2016. My husband Ed, my son, my friend Denise from high school, her daughter Hannah and Hannah's friend Shelby were on my team. We three adults rode the 10 mile ride, and Boy did the 25 mile bike ride; youth, it is wasted on the young.

So I started riding my recumbent bike so I could earn a jersey. To the grocery store. To the library. To the Post Office. Diligently, I rode. But golly, a jersey or two in the meantime, to tide me over, couldn't hurt. So now I've got some jerseys, all fraught with meaning. See what you think.

The Angry Bear Jersey - for days when I am grumpy. Grrrr...


The Ben & Jerry's Jersey - because every ride ends with a kiddie cone. My son finds this one to be the most hideous.


The Mrs. Shumway Jersey - when I was growing up, it was my chore to ride my bike to get the mail every day. Mrs. Shumway handled the front desk at the Post Office. Mostly I got this jersey because I liked the dark blue. But I'm also quite fond of the Post Office. They bring me stuff. And they take stuff away too. You can't get any better than that.


The Erie Lake Monster Jersey - for days when I am feeling very strong. Note to my Dear Sweet Husband: If this, per chance, is the jersey that I am wearing when one of those big rumbly trucks comes tearing up 15A and inadvertently takes me out, I hereby give you permission to rail at the heavens above with something like "My EYES! How could anyone not see that blast of ferociously overly bright freaking green? OH THE HUMANITY!"


The Hell on Wheels Jersey - it goes with my helmet. It's always good to accessorize.


The 2016 Go Pink Breast Cancer Ride and Run Jersey - My family and friends worked the hardest for this one.


Thursday, June 23, 2016

Inspiration at the Estes Park Wool Market

I made it to my first ever West Coast wool market, the Estes Park Wool Market, held in Estes, Colorado June 9-12. When I walked in the door, I knew I'd be happy. I plunked down my money and bought a fiber festival hoodie, and then I nearly walked right into the most beautiful quilted jacket. Check this out:


Look at the colors and the stitching. This was created by Amy Fox and is called My Secret Garden.

Then I saw these lovely knitting bowls made by wet felting. What a great idea... I could artfully arrange my yarn treasures all over the house in color coordinated bowlness. This is by Kay Dudek. I love the little button accent. Notice that she used both felt and silk, for nuno felting. The silk is the lighter green part of the bowl that is all ruchey (puckered). And do you see the button? What a lovely touch.


This was also offered by Kay. What a clever way to use up those glass nick knacks that you've inherited from Aunt Mabel:


One of my favorite booths was Bijou Basin Ranch. Why yes, I did want to buy some $100/ounce qiviut, but I couldn't think of anything that I could make that would do it justice:


My sister and I lusted over these woven yak scarves. They were oh-so-soft.


In the end, I settled for a t-shirt, as a remind of what might have been...


I have to admit, I wore my t-shirt to the airport, waited through a hideously long line, and can't believe that not one person chuckled. Have the people fleeing Colorado no sense of humor? Honestly, I thought this was the funniest t-shirt ev-er.

Monday, June 20, 2016

I Stand Prepared for the Harsh Winter Ahead

Check this out. I bought some hand-dyed Polwarth fiber from Honeoye Craft Lab. I love the colors, they are so bold. Isn't this lovely? I bought 8 ounces, so two of these:


This is what it looks like unraveled:


And this is what it looks like all spun up on my Hanson eSpinner:


Liz, from the store, taught me to Navajo ply. There are many nice things to say about Navajo plying:

1. You work with one ball of yarn, but triple ply, so you get a nice, thick yarn.
2. By using just the one ball of yarn, it is easier to preserve the stripes that you can see in the roving and yarn.
3. I found it less prone to knotting up while I was dealing with it, since there's just that one skein.

Here's what I knit with it, a lovely cowl and hat. That hat is super thick, perfect for a very cold walk in the neighborhood with my sweetie pie. There's a little bit of yarn leftover, though I don't think enough to make mitts.


Thursday, April 7, 2016

A Little Bling for that Thing

I love my mitts. Recently, I've started watching for small pieces of jewelry at estate sales and garage sales to add to the mitts to give just a little bit of glitz. See what you think:


You can't use too big a piece, or they get in the way or weigh the mitt down. And I've been thinking of tacking them down with a little thread. But they're super cute. And you don't have to get all matchy matchy and try for two pieces per set of mitts. One little bit of glitz will do. My first attempt was using a pin with a hat, but the pin was too heavy and the recipient parted with the pin. So if you try this, be careful to go for something lightweight.


Do you like my cardboard cutout hands? I had a bad day and chewed my fingernails, so I can't be a hand model right now.

Sunday, April 3, 2016

My "Only a Mother Can Love" Sock

This is my first sock. I have carefully extended my leg in such a fashion that it looks like a work of art.


I like my sock. It has a red yarn thread running through the heel, which you cannot see, because I am supposed to put an afterthought heel into this sock. But if I do that, then this sock would fit my husband, rather than me. Although I like him a lot, he hasn't done anything spectacular enough this week to earn this sock. So I suppose it will have to go heel-less. The yarn is very forgiving and does not seem to mind not having a heel.

I don't want to tell you about how bad the toe is. I tried to follow a pattern, but I am using teensy 9" circular needles, followed by 3 ever so sweet bendy double-pointed needles. None of the patterns take into account my avant-garde choice of needles. And then, at the end, I was supposed to have 12 stitches left on my needles, and I was supposed to do a kitchener stitch. I looked up how to do a kitchener stitch, and concluded that I had lived my life well and did not need to be the next person to learn how to do that. So I darned the stupid toe together in as delicate a fashion as I could come up with. Since you are not my floor, you will, hopefully, never get to see what happens when a woman has had a falling out with her socks.

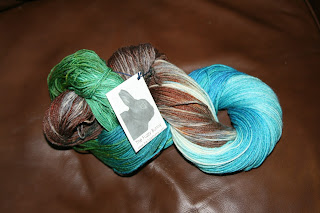
This is the yarn that I used. I bought it at the Honeoye Craft Lab. It is hand dyed by Liz Yokel, the store owner.


There appears to be enough yarn to try this again. And perhaps, after I've had some Andy's Candies, I will come back to that. But for now, I am going to sit here with my one handknit sock that looks like someone stapled the bottom, and just be satisfied.

Liz's yarn is 400 yards, 4 ounces
75% superwash merino/15%nylon/10%tencel
hand dyed with eco-friendly dyes
4 ply, fingering/sock weight
7 sts/in, US 0-3 needle
$19 for the skein

Tuesday, March 22, 2016

Did I Ever Tell You the Story of the Three Legged Sheep?

True confession: I can only remember the punchline of two jokes. So here I'll share one joke, lifted from a joke website, with minor alterations to suit the story of last weekend's knitting exercise...

A traveling salesman trying to make a buck was driving through the plains of Nebraska when he decided to stop at a farmhouse coming up on his left. As he was walking up the driveway toward the front door of the house, a sheep with three legs caught his eye. It was just hobbling through the grass.
When the farmer answered the door and asked what he was selling, the salesman first asked about the three legged sheep.

"That sheep is the most amazing sheep in the land, son," the farmer said.

"Last year, our house caught fire when we were all asleep and that sheep ran in and woke us all up one by one and saved our lives!"

The salesman was surprised. "That is one special sheep," he said.

The farmer replied, "That's not all. Last summer, that sheep jumped into the pond and dragged my drowning son to safety. He would have died!"

The salesman was in disbelief as to how incredible this sheep was. "One question: why does he have three legs; is it from the fire?" he asked.

"No son, ya see, a sheep like that you just don't eat all at once."

*************************************************************************

So a couple of weeks ago, I was trolling around the internet and came across Honeoye Craft Labs on facebook. And I noticed they were selling kits to make sheep hats. Hats for people, with sheep knit on the hats, not hats for sheep. (I feel bad that I feel the need to clarify on that point, but I've heard about people knitting outfits for assorted endangered animals, so figured I must.)

And then I saw they were selling these bendy double pointed needles, called Neko curved dpns, and I watched a video about how to use them and thought maybe they could solve my problem with dpns. My problem with dpns is that I always look like I'm in a wrestling match at the end of my hat and mitts projects, with needles flying all over the place, and a certain amount of mumbling and ill-will.

So my husband took me for a field trip (I grew up in Honeoye, and it's only 20 minutes from where I live), and we picked up the yarn, a free pattern called BAA-BLE Hat by Donna Smith, and the bendy needles. And since I've never done multi-color yarn knitting, I hired Liz, who owns Honeoye Craft Labs, to teach me how to follow that pattern.  

Here's my first sheep hat. For a first time using multiple colors of yarn, I think I did pretty well. I'll admit, we got to a point pretty early on where it became clear that one of my sheep was missing a leg. Liz gave advice about how one might deal with that problem, but it seemed to me that a one legged sheep was sort of a badge of honor in the world of learning to knit. So I decided to let him soldier on as is. All the sheep ended up with faces in the right places, so I am pretty tickled.

My one legged sheep hat
I decided to make another sheep hat, with these adjustments:

1. The hat came out a little tight around the area with the sheep, so I'm going to try perfecting my stranded knitting skills. I also forgot to bring all my needles with me for my lesson, and the pattern said to switch from size 4s to size 4.5s, so I ended up knitting with size 4s for the whole thing. Also, I'm a tight knitter, so these sheep were pretty well destined to be dancing in a tight conga line.

2. I like a bigger brim, so I made my next one longer.

3. While I am not normally a hat pompom person, Liz made a pretty good case for buying a pompom maker.

4. I wanted to try a night sky at the top of the hat, so I bought a skein of dark blue yarn from Liz. The pattern called for four different colors of a yarn called Ella rae Classic Sport, a 100% wool yarn that cost $4.50/ball. It looks like I can get at least 2 hats out of the yarn that I originally bought, probably more with the dark blue, since you don't use much of the brown. I love the colors of the Ella rae - there's lots of variety, but the colors are just a bit muted, so they seemed more natural looking.

Here's the second hat, and a matching cowl:


As for the bendy Neko needles, I found that they work particularly nicely on thumbs for my mitts. I felt like I was able to finish more quickly, and that I had more control. I recommend them. They were $9.95 for a set of three - I took a look on ebay, and they were much more expensive there.

These are the mitts that I made with my bendy needles. I handspun this yarn, made with 50% white angora, 50% black alpaca, blended on my Patrick Green electric drum carder and spun up on drop spindles. Thanks to the bunny, these will be particularly snuggly.


Wednesday, March 16, 2016

Watercolour Painting with Wool by Renata Kraus

oooooooh! I've just received this fantastic book in the mail. It is by Renata Kraus, and she explains in lovely detail and with lovely pictures how she makes her wool "painted" artwork.


I can't wait to try out the techniques. Renata is a true welt felting artist. I highly recommend this book. I love the chapter at the end where Renata shows children's wet felting examples. 

Thursday, March 10, 2016

Man Candy, or the Candy Man?

For our anniversary a couple of weeks ago, I decided I would make my man a hat. So I made him a hat. Because of my deep love for him, I even did that careful knitter thing where I knit up a swatch to ensure that the yarn and needles were the right size.

I finished the hat in the wee hours of the morning with two days to spare. I put it on my head, because waking your husband up at 3am so he can try on a hat does not go over well over here, and I have to say, it was a dandy hat.

The next morning, he tried it on. And, sadly, it turned out that there is more to knitting a swatch than what I did. It seems my sweet husband's head is bigger than mine. Quite a bit so.

Little sigh.

So, I got out the yarn and knit a second hat. I added more stitches. And I knit an extra six inches for the brim. Another wee hours of the morning exercise. And he put this one on, and it was not bad. I suspect that if I had knit an extra 10 inches for the brim, it would be even better. But still, he's a handsome man and he looks quite marvelous.

So I made him a matching cowl.

Cleaning Lady looked at it and thought it would be too poofy, but my man can carry off just about any look.

So today we were going to go for a walk in the rain, and I suggested we get Boy to take our picture. There was a little contention over Dear Husband's choice of accessories. Boy argued that we are quite thoroughly an embarrassment. Dear Husband says everything coordinates. You'll have to judge.


The yarn for the hats and Dear Husband's cowl came from Sew Green, a charity in the 19th Ward in Rochester that teaches people to knit and sew, and sells donated supplies. This yarn is from Lang Yarns and is called Jawoll Magic. It is 6 ply superwash, 75% virgin wool, 25% nylon. It was dreamy to knit with. I got 3 great big skeins for $13.50 each. I have one skein left. I'm going to make a cowl for me out of it. I followed my favorite pattern for our cowls, from the sourcherries website. My cowl is from a different yarn, a gorgeous turquoise-y blue green-y Louisa Harding Kashmir Aran yarn, 55% merino wool, 35% microfiber, 10% cashmere. I picked up 10 50g balls at SewGreen for a mere $6 each.

The mitts are for Nanny Holly. I just finished them last weekend. I made the cuffs extra long so they could roll up and provide a little extra wrist warmth. Then I tacked the cuffs so they would stay in place. These are to go with a hat that I made Holly from Knit Picks City Tweed DK, in the color Morning Glory, This is a DK weight yarn that is 55% Merino Wool, 25% Superfine Alpaca, 20% Donegal Tweed. There were 10 balls of this, also purchased at Sew Green, for $25. I've made two hats out of it so far, and expect to use up more of the yarn by making cowls and matching mitts.
Here's Nanny Holly with her hat. The coordinating cowl is from handspun that I made a while back, filled with angora and silk and alpaca. I made it extra long so it could be wrapped three times around the neck. Nanny Holly is almost ready to head out in a snowstorm. Her baby is sporting a cowl as well, though I held onto that because I imagine a cowl would at worst be a choking hazard, if not the ultimate drool cloth.


All our hats are from a pattern called Bronze Age Hat Free Knitted Pattern. I love this hat pattern. It is very comfortable.


Wednesday, January 27, 2016

Curse You, Thumb Gusset!

I have been prodigiously prolific this week and last. My very narrow repertoire of one cowl pattern made on an assortment of different sized needles has held up well. Hats, following the pattern my mother taught me, are starting to look somewhat similar; a good thing given that they are all following the same pattern. But it is the thumb gusset for mitts that is my nemesis. Stupid thing. I've made one mitt, on teensy circular needles, and it is like knitting with toothpicks and a short line of dental floss. If I have arthritis, it is speaking to me now as I slog away on my mitt. And the sad thing about mitts is that you have to do two of them. Curse you, thumb gusset.

Here's my thumb gussetting nemesis. The yarn is a gorgeous turquoise-y blue green-y Louisa Harding Kashmir Aran yarn, 55% merino wool, 35% microfiber, 10% cashmere. I picked up 10 50g balls at SewGreen for a mere $6 each. It's very soft. So far, I've used 3 balls to make the cowl - the balls are 83 yards each and it's recommended to use a size 8 needle. I am working with a size 7 9" circular needle, which is likely too small, but I like how tight the knit is... I just don't enjoy doing the tight knitting. The mitt used quite a chunk of one ball; it would be enough to knit a full mitten if I weren't so mad at the gusset just now. 

I've got six balls left, so I've got one more mitt to make, a hat, which I think will take two balls... I suppose I could make another cowl and then come up with some other yarn in a complementary color for a hat and mitts. We'll see. That second mitt is going to kill me.

Here's my current mitt recipe, so I don't forget it. Note that I make no claim to being a pattern writer; there are lots of people who are better at this than I:

On size 3 9” circular needles:
  • Cast on 36 stitches, place a row marker
  • Knit one perl one for 25 rows
  • Knit 10 rows
  • Knit 2 stitches, place a second row marker, finish the row, then knit a row. Then increase a stitch, knit the two stitches between the row marker, then increase another stitch (so now there are 4 stitches between the row markers), finish knitting the row, then knit another row. Keep increasing until there are 14 or 16 stitches for the thumb gusset, place stitches on pin
  • Knit 10 rows, perl 2 rows, cast off
  • Use double pointed needles and split off the 16 stitches for the thumb gusset. Increase 3 stitches while circling around the thumb, battle mightily until you cannot stand it any more (5 rows), then cast off in disgust and get out the darning needle to fix all the bad mojo. I also had to break out my nail manicure kit to grind down my nails so they would stop catching on the yarn in my mitt.
Another version that I like:
  • Cast on 34 stitches (really, for me it just depends on the thickness of the yarn and how many stitches can comfortably fit, taking into consideration that with the circular needles things get tight when I add on the additional stitches for the thumb gusset). Place a row marker.
  • Knit one perl one for 15 rows.
  • Add a little fanciness - I'll knit a row and then perl a row to get a border above the cuff and then knit 13 rows for a total of 15 rows; or I'll knit a row and then perl a row, then knit two together and then yarn over for a row, then perl a row and then knit 12 rows for a total of 15 rows.
  • Knit 2 stitches, place a second row marker, finish the row, then knit a row. Then increase a stitch, knit the two stitches between the row marker, then increase another stitch (so now there are 4 stitches between the row markers), finish knitting the row, then knit another row. Keep increasing until there are 14 or 16 stitches for the thumb gusset, place stitches on pin
  •  Add another round of fanciness - I'll knit 8 rows and then perl 2 rows and cast off, or I'll knit 7 rows and then perl a row, then do a row that knits two together and then does a yarn over. Cast off.
The cowl pattern is a free pattern I found on pinterest by SourCherries. It is my current favorite cowl pattern, so I keep making the same one. 

UPDATE - I finished the other mitt, and for some reason it went much more smoothly than the first mitt, so all is well. The first mitt is a little tighter fitting, but I don't think that's a problem.

I made a matching hat, using a free pattern I found at Expression Fiber Arts called Bronze Age Hat Free Knitted Pattern. It was a delight to knit, producing a cozy, slouchy hat, and the pattern was easy to follow. I had to learn one new stitching skill, ktbl. I learned this by watching a youtube video. Bless the internet, it has made my life bearable. A special thanks to Chandi Agee for sharing her pattern. Don't look too closely, as I didn't get it done perfectly, but still, it turned out very well and I'm going to do another with a different yarn.


Now I'm down to four balls left... what to make?

I also finished this dandy cowl. I picked up 3 skeins of vintage Noro Silk Garden for $8 each at SewGreen. I never would have thought to put these colors together, but I really like them.


I bought this yarn because I had heard a lot about Noro and wanted to try some. Each ball was 50 grams, consisting of 45% silk, 45% mohair, and 10% lambs wool. It's pretty soft. It is self striping yarn, which means each ball has long, 15 yard stripes of color. 

I'm planning on dyeing yarn this summer and I want to try this technique myself. I figure, you measure out the yarn in 15 yard increments and sort of pile it up. And then you pick different dye colors and dye each of the piles. I think I'd also like to try taking different colors of roving and weighing them out and then spinning a certain amount of one color, then switching to another color and spinning that, and so on. Now that I've seen these colors, I can see a way to make use of some of the brown alpaca that I've got tucked away in the basement.

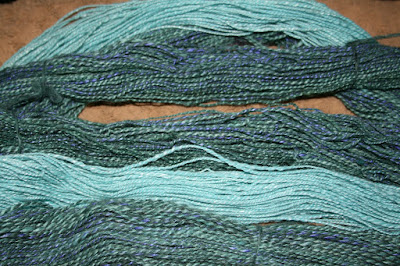
I also wrapped up some yarn for a friend of my sister's. The turquoise blue yarn is 1/3 silk, 2/3 alpaca and dreamy soft. The multi-colored yarn has lots of different stuff in it, mostly alpaca. You can see purples and greens and some turquoise:


Saturday, January 9, 2016

Old Grapes Make Pretty Good Row Counters

Those of you who are old hands at knitting probably have some sort of device to keep track of your rows. I have one somewhere, but I'm not sure where it is. So I decided to use grapes. I've got these grapes sitting next to me that didn't taste all that good, so now every time I finish a row, I put a grape onto a plate, and when I get eight grapes, I switch to purling and throw out the grapes. Don't mock me, it's working pretty well, and it makes me feel a lot better about the crappy grapes... kind of like I'm giving them new life.

I also read that you could use a piece of yarn as a stitch marker. I'm pretty sure I have two packages of stitch markers, but I can't remember where those are.. I can see one lonely marker sitting next to me, but that's it. So the scrap of yarn is working as my stitch marker for now... kind of makes me feel silly about buying those packages of stitch markers. Seems to me like if my kid gets braces, I could use those colored rubber bands...

Last week I decided I wanted to make some yarn for my friend Linda. I didn't want to oversell its virtues, so I added a dandy truth in advertising statement to each of the skeins:

Moderately (but not embarrassingly) Imperfect